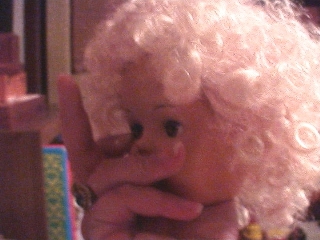
Often on eBay I see a listing with the text something like "a few missing lashes but these can be easily replaced.."
I hope this will show you that it's not that easy, but can be done. It just takes patience and practice. This is a
great example of a project that should be tried out on a doll that isn't too valuable. You may not get it right the
first time and there are a few pitfalls.
|
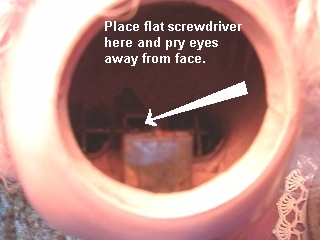
The first thing you need to do is remove the head and then remove the eye assembly. On most of the compo and hard plastic dolls the eyes are on clinchers.
This is a bar clamped to the inside of the bridge of the nose on which the eyes rotate to open and close. To remove the eye assembly, I put a flat headed screwdriver
into the clamp and twist and pry until the clamp opens and the eyes come away from the inside
of the face.
|
|
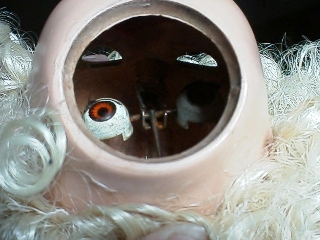
Here you can see the assembly is almost free. Once it is loose, you can grasp it by the counterweight and
turn it so that the eyes can come out of the head at an angle. Remember this procedure because when the
lashes are done, you can put the assembly back into the head at the same angle.
|
|
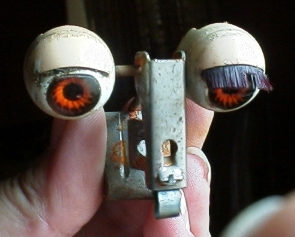
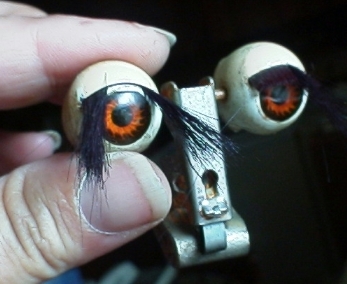
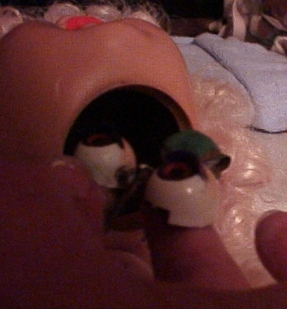
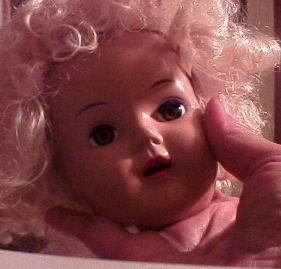
So the clinchers are out and now we can see what needs done. On these, the right eye has only a few lashes missing and the left has
all the lashes broken off. The lashes are in a slit in the metal ball and held by glue or sometimes a strip of paper inside the eye.
Generally, if more than half of the lashes are missing, I pull out the rest and start from scratch. If only a few are missing, I try to
replace just those lashes without disturbing the ones that are intact.
|
|
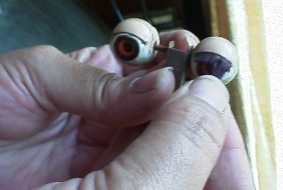
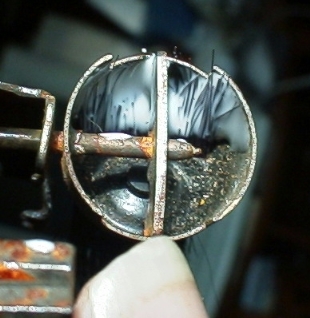
Use tweezers to pull out any broken lashes that you're going to replace. Poke a fine needle into the slit that held the missing lashes to make sure it's free of any lash remnants or glue. When you can hold the eye up to the light and see the hole is unobstructed, you're ready to replace lashes.
For black lashes like these, I use a big makeup brush as a source for lashes. For brown lashes I cut bristles from a camelhair paint brush. If you shop the hardware stores and craft shops and take the clinchers with you, you can usually match the color perfectly. If you can't you can always pull out
all the lashes and replace them all with bristles as close to the color as you can find. Cut your lashes from the brush and poke them into the hole a few at a time. Use your needle to tamp them down against the lashes that are still there. Don't worry about the length, you'll trim them even later.
|
|
On the eye with no remaining lashes, push them into the center of the curve and then work them over to the edges.
|
|
Keep adding lashes and pushing them to the side until the slit is packed with new lashes.
|
|
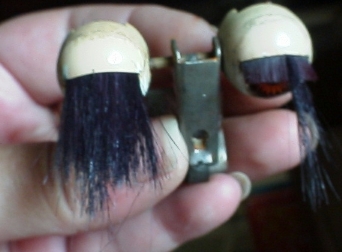
Once the lashes are all in place, use a small paint brush and paint Elmer's Glue along the slit and over the new lashes on the inside of the eye. Use quite a bit and tamp the glue well into the lashes with the paint brush.
Now on the front side of the eye, use your finger to even out the thickness of the lashes and to adjust the angle it comes out of the slit. Put this somewhere out of the way to dry.
|
|
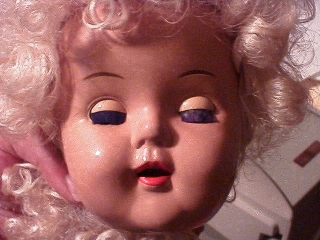
Once dry, you can use sharp toenail clippers or embroidery scissors to
trim the lashes the same length and shape on each eye. By keeping the
lashes on the one eye, we know exactly how long to cut the new ones
on the other eye.
Now the tricky part, putting them back. When they were originally clamped to the bridge of the nose, either the head was still in two pieces or a special tool must have been used. I've never been able to find a way to clamp this in place with the head in one piece. So I cheat!
On the "What I Use" section of this web page I show an epoxy wood.
There are several different varieties of this epoxy putty, and just
about any of them will do. I use the yellow and blue plumber's epoxy
ribbon for this. I doesn't set up as fast as the wood and gives me
more time before it sets up. The wood gives about 10 minutes and it
may take longer to get the eyes in place.
|
|
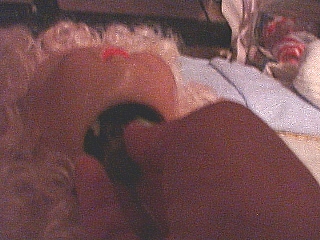
Gently spread the clamp open a little on both sides
with pliars and put a small lump of the putty inside the clamp
where you put the screwdriver to pry the eyes out. Now hold
the back side of the clamp on your middle finger and angle
the clinchers into the neck opening.
|
|
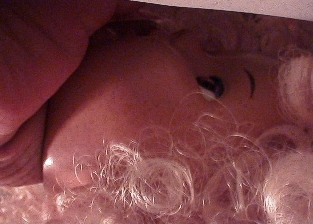
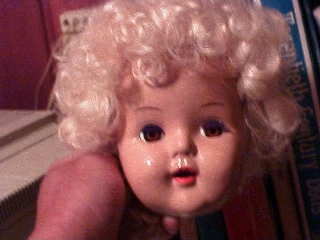
Hold the head face up
and maneuver until you see the eyes looking out of the sockets.
Patience! The clamp will probably loose its balance on your
finger and fall into the head. Keep trying, you'll get it!
|
|
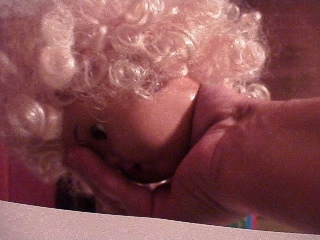
Once you have the eyes looking out, holding them in place,
flip the whole head over and hold it over your head so you have
to look up at the face.
|
|
In this position, the
eyes should be open, so let them fall open and adjust them
so that they are alligned and the lashes are out of the
sockets and resting on the upper edge of the sockets evenly.
Now push the clamp into the backside of the bridge of the nose.
Push firmly - middle finger inside and thumb outside.
Still holding the eyes in place, turn the head over so
it's face up. Pull your hand away from the counterweight
while still holding the clamp with your middle finger and
let the eyes close. Again, adjust on the clamp with your
finger until the eyes are even in the closed position.
|
|
Once you're sure they open and close freely but are
alligned and positioned properly,
turn the head over face down and allow the epoxy to harden.
|
|
All done! Now you can put the head back on the doll.
I remove the metal hook from the elastic chord and put
it in place inside the head. Then I use a button hook
to pull the elastic chord onto the hook.
|
|
|
If you're short tempered, this project is not for you! Better to send it to the
person who listed the doll and said the lashes were "easily replaced" (grin)
Practice getting the clinchers into the head and into
position before you put the epoxy on the center clamp. Once you get good
at it and you're sure you have the knack, then you'll be sure to get
them in place and properly aligned before the epoxy sets up.